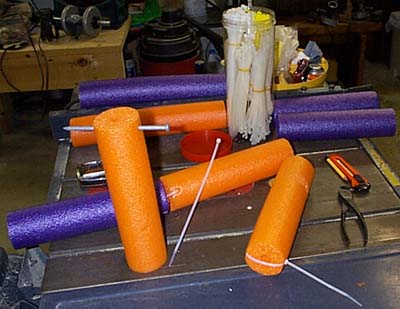
Materials for Arms and Legs to be used in the various dead "bodies" that will be haunting my house. Yes, those are cut up pool noodles and zip ties. I found two 10" pieces make a nice arm and two 12"-14" pieces may nice legs. Of course, measure the clothes you intend to dress the body with for a proper "fill".
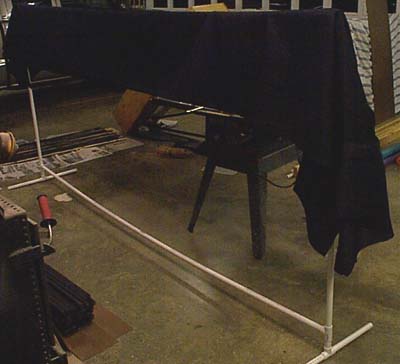
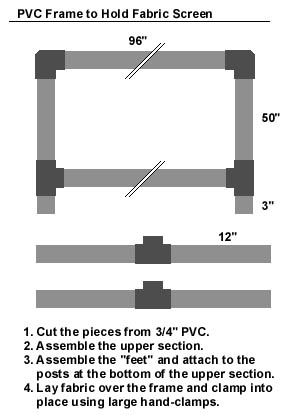
Screen Frame with Fabric On Top, to "guide" visitors down the sidewalk and not into my garage. You can see it in the picture of the cemetery gates below. It worked well, but I will really need two screens. Also, the frame needs to be connected more firmly (probably using screws instead of glue, so it can be disassembled). Here is a simple diagram of how to build a screen like this, should you be interested.
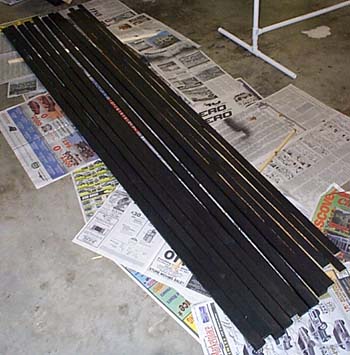
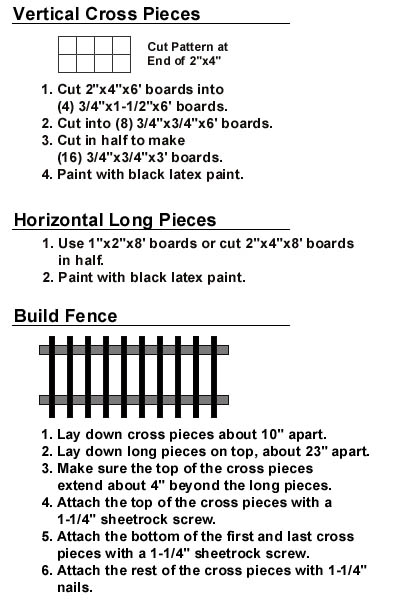
Fence Cross Pieces. Most were made from 2"x4" boards ripped down to 3/4" widths. Four are plain 1"x2" boards, which was more expensive, but a great deal simpler.
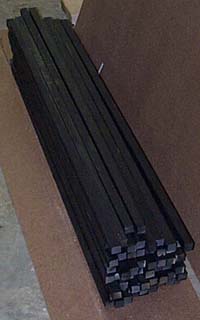
Fence Slats to make 50' of fence! The slats were attached to the cross pieces using 1-1/4" sheet rock screws at the top and ridged nails at the bottom (smooth nails will slip out, so finding the ridged nails will be worth the effort). Refer to the diagram/instructions for more information.
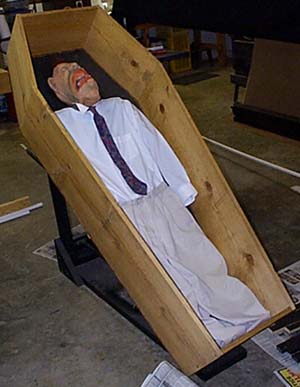
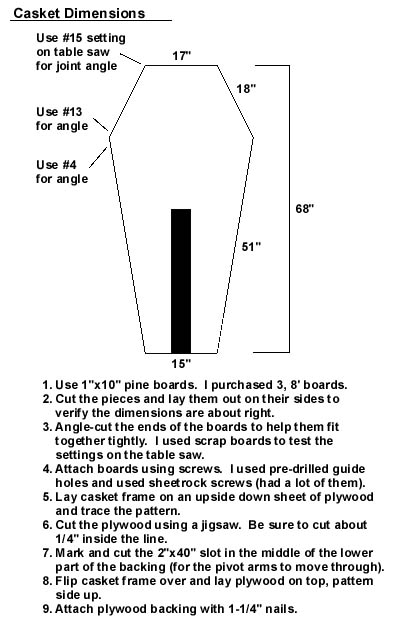
Casket with "Jumper" in place, ready to spook. The casket will fit bodies up to 5'10". The casket is made from real, 12" pine boards. The casket cost about $35 to build using wood and stain from Lowe's. The backing is an old sheet of paneling, reversed. I planned to paint the backing black anyway, so using old wood wasn't a problem. It weighs about 25 pounds fully assembled. Here are a rough schematic and list of steps I created after I completed construction of the casket. I have also created a parts list/diagram showing how to build the PVC body using 1/2" PVC.
Mechanism to Animate Casket "Jumper". Note the double levers. My design is an adaptation of "The Body Slinger" by the Scary Guys. I don't know the exact lengths of the pivots. They started at 42" and 41", but I made minor adjustments once all of the pieces were in place.
It is important to build the frame and put the pivots in place before gluing any of them. It is important to see the body frame move through its motion to ensure everything is cut to the proper length.
I used a piece of aluminum conduit inside the PVC to reinforce it. The "body" was simply too heavy to rely on the strength of the PVC pivots.
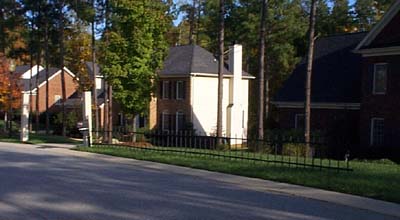
View of the fence and columns from the street. The fence sections are supported by a piece of rebar driven into the ground and attached using black zip ties. The fence is so light it didn't require much support, but it needs something since everyone seemed to grab a hold of it after dark.
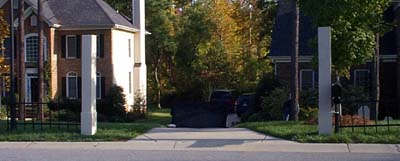
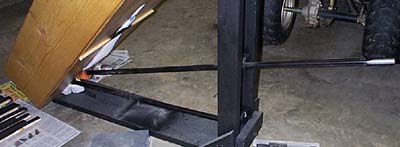
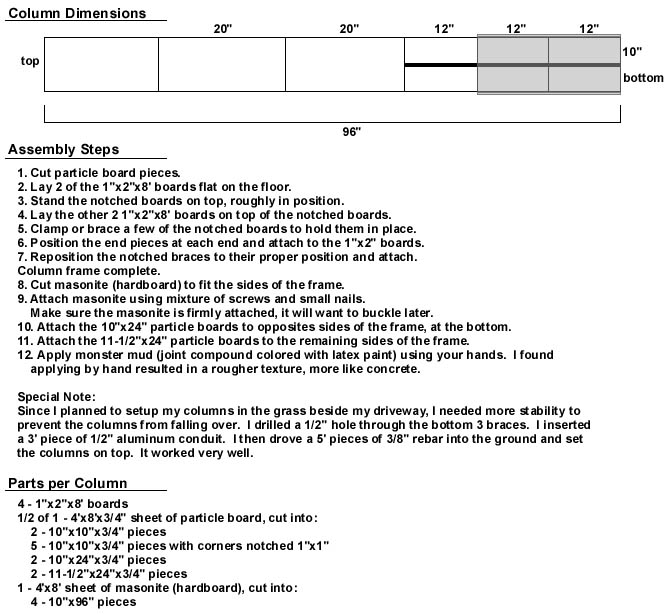
Closer view of the columns at the top of the driveway. The columns are made from masonite (hardboard) around a frame made with 2"x2"x10' boards at each corner with (mostly) square supports spaced out from top to bottom. I drilled a 1/2" hole through the center of the bottom 4' of supports and inserted a piece of 1/2" aluminum conduit. To keep it from falling over, I put a piece of rebar in the ground and set the column on the rebar. Here are a diagram and instructions to build columns as shown here.
The casket jumper will be placed at the right end of the black screen in the driveway. A fog machine was placed at the left end, with a fog chiller to keep the fog on the ground.

The sidewalk with a little white fence to keep kids out of the electrical cords in the grass. The fence was originally used to line a small garden. You can also see the large tombstones on the left. Sadly, the more excited kids (including my own!) just jumped over the fence when the tombstone jumper jumped.
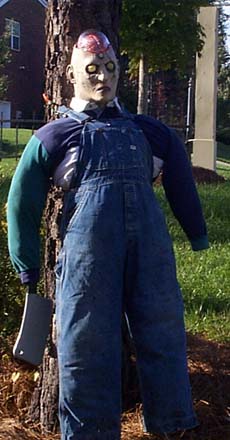
This guy is hanging in a pine tree directly across from the casket. His yellow eyes blink and he is holding a meat cleaver. He is made from extra clothes and stuffed with grocery bags.
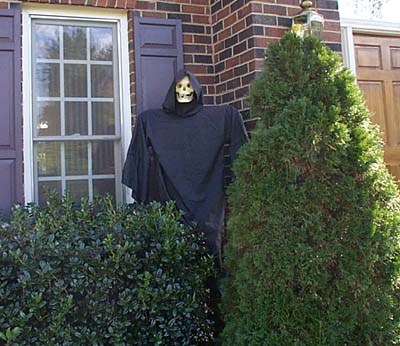
After dark, this prop is lit with a red floodlight, angled up from below, creating some nice shadows in the eye sockets of the skull. The frame holding the skull and robe is made from 2x4's and 2x6's that were cut to shape. The skull is nearly 8' high! The frame breaks down into two pieces for easy storage.
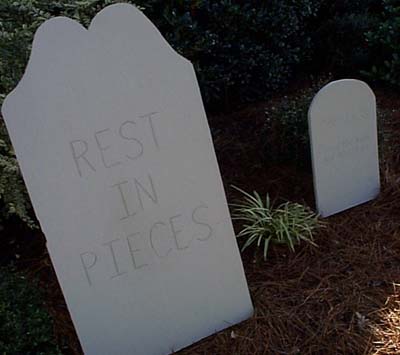
Here is a close-up of the largest tombstone with writing. It was made from a sheet of insulation board (typically put on houses). The words were "engraved" using a Dremel with a cutting bit. All of the tombstones were hand-painted (literally) with Monster Mud (joint compound mixed with latex paint). If you like finger painting, you'll love this!
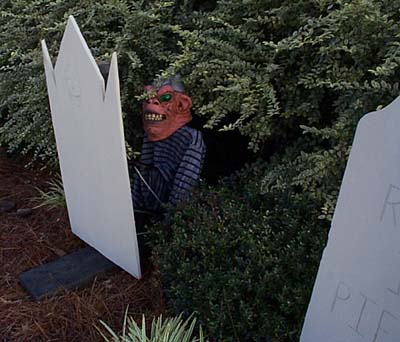
This side view of the tombstone jumper should give you an idea of how it works. The jumper is on a PVC frame with two equal-length pivot arms, attached to the wooden frame. The tombstone is attached to the outside of the frame to hide the mechanism. A rope is threaded up the frame and back down to the bottom of the PVC frame. When the rope is pulled, the frame is lifted and the "jumper" stands up. The rope broke one time from friction between the rope and the screw-eyes the rope is threaded through.
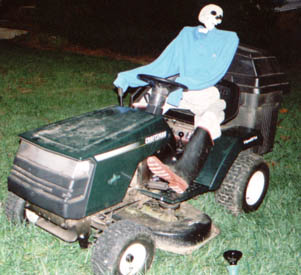
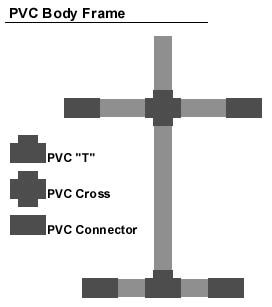
The lawn maintenance man was made from a PVC frame and covered with some old clothing. When I finished building him, I just set him on the tractor to get him out of the way while I worked on something else. My son saw him and asked me where I was going to put the tractor in the yard. So I put the tractor out this year with the clothed skeleton on top. The kids seemed to like it, but it needs better lighting next year. Here are some rough plans to show how the PVC frame was built. The plans don't show that I used pieces of pool noodles connected with zip ties to make the arms and legs.

| Look, it's a dummy in the coffin...I mean it's Joseph in the coffin. We found that my measurements were off a bit since Joseph is a bit too big to fit properly, but I guess he won't really care, right? |